
I found the instructions for these charmers care of that crafty lass, Martha Stewart. I used the three sizes that she suggested on her site, with fabric cut to 5x10, 8x16 and 11x22 inches. Based on this formula, you really could make your pumpkins as big or small as you'd like, just cut your fabric so that the length is twice the width.
A note on cutting your fabrics. Martha suggests cutting the fabric on the bias, which is great, but can be wasteful. The fabrics that I used included a velour-type, a printed cotton and suiting plaids. The velour-ish fabric was pretty stretchy, so I just cut it with the grain. For the smaller plaid pumpkins, I cut them on the bias, but I didn't have enough for the large one, so I cut that one on the grain, too. I think varying whether you cut on the bias or not helps to add variety to the sizes and shapes of your finished pumpkins.

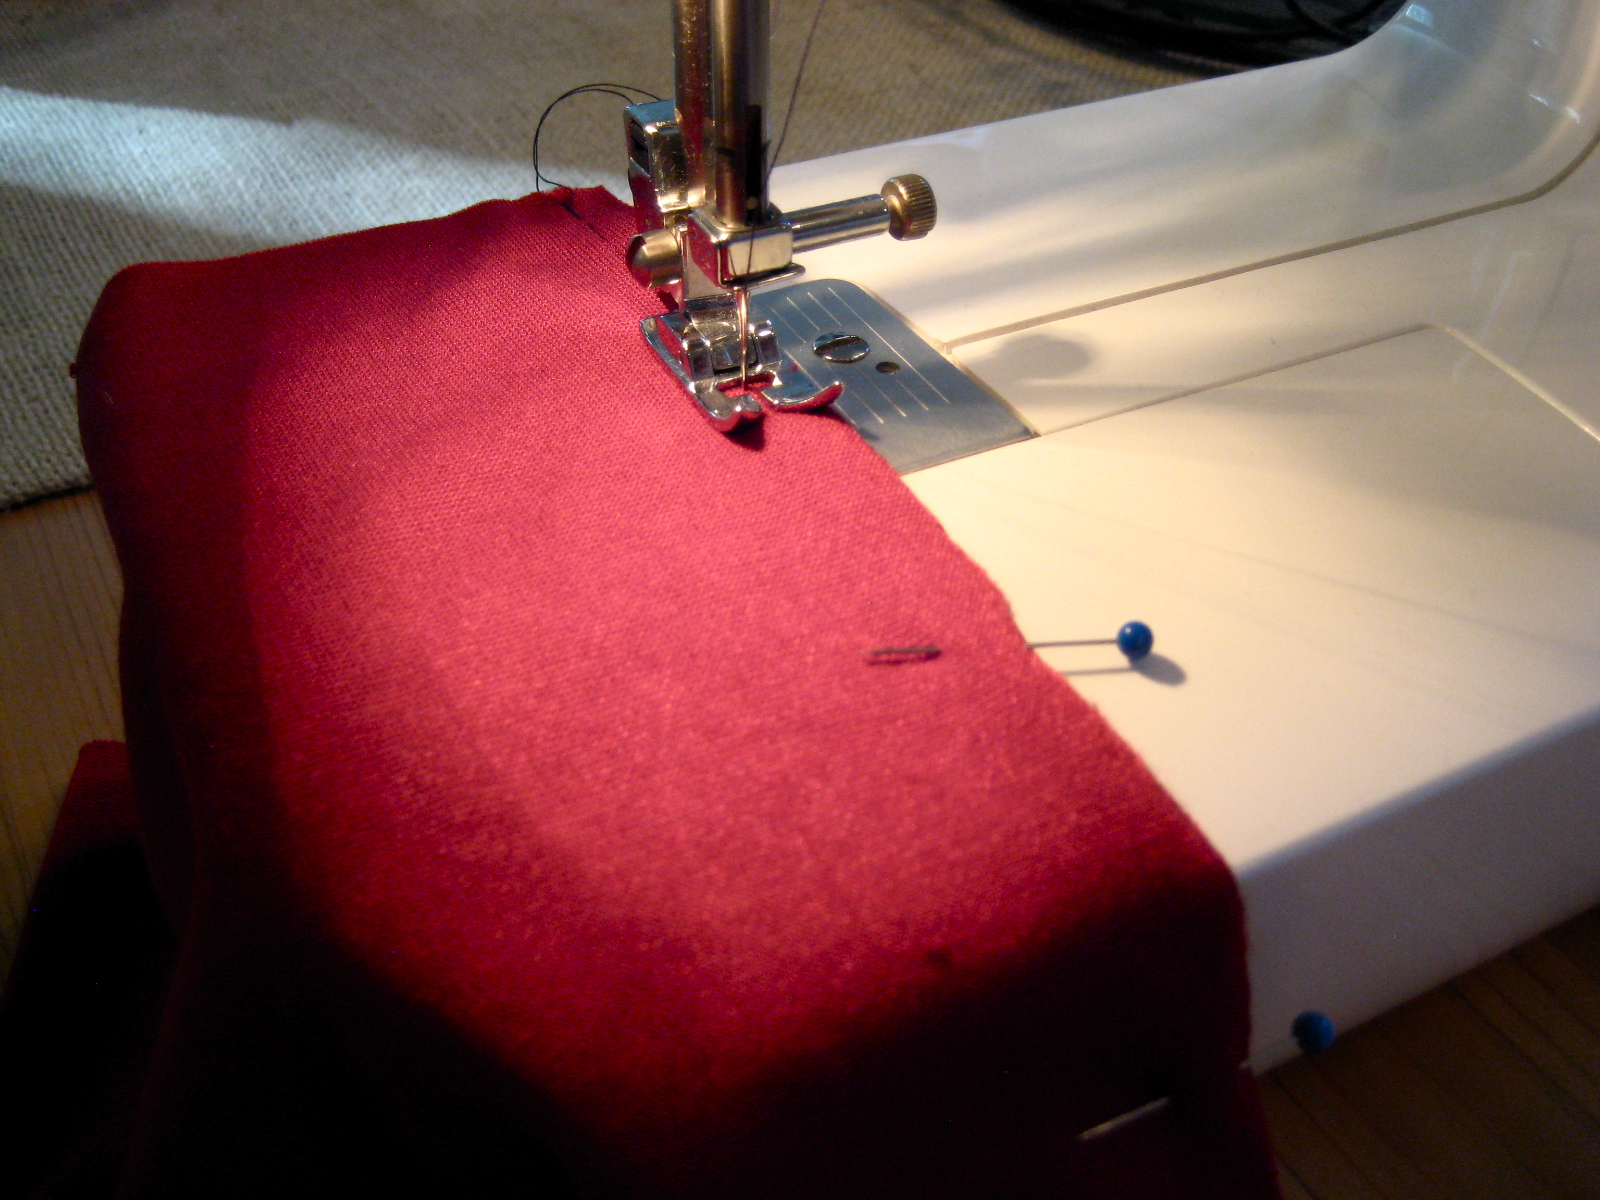
As you can see in the photo below, my rotary cutter slipped a bit and I didn't end up with completely straight lines. This project is extremely forgiving, so if you end up with lines that are a bit crooked, just go with it!

Fold your fabric right sides together, with the short ends meeting up. I used a couple of pins before sewing, but it's just a straight seam, so it's not really necessary. Stitch down the edge, leaving about a 1/4 inch seam allowance.
I purchased several colors of embroidery floss to create the "lines" of the pumpkins. I ended up using the floss to gather both the bottoms and tops of the pumpkins, and to attach the stems. A larger needle works nicely.

To gather the bottom, simply stitch about 1/2 inch from the open edge going all the way around. I started and ended at the side seam. I used larger stitches on the larger pumpkins and smaller stitches on the small ones. Your stitch sizes do not need to be exact - remember, this is a forgiving pumpkin!
Once you've gone around the entire edge, cinch the fabric together and tie it off.


Now is a good time to turn the fabric right-side out and admire your lovely gathers.

Add some poly-fil (or a similar product) and pack it in so it's somewhat compact. Leave about an 1 1/2 inches of fabric at the top. Repeat the stitching like you did on the bottom so you can cinch up the top of your pumpkin.

Once you've pulled the gathers together, tie it off, but don't cut the floss. Go ahead and leave the edges of the fabric on the outside. It makes a sort of stump that you can attach your stem to. With this red fabric, I think mine looks a little like a pomegranate!

Start wrapping your floss around the outside to form the "lines." I made a small stitch on the bottom for each line. I think this helps to keep the lines in place. Pull the floss a little tighter so that it starts to create that traditional pumpkin shape.


I know that real pumpkins aren't symmetrical, but I think that 8 lines creates a really cute shape. When you've finished with the lines, be sure to tie off your floss, but don't cut it just yet.

Squish your pumpkin as much as you can and pass the needle from the center of the top to the center of the bottom and back a couple of times. This helps to pull the stem toward the bottom and create ridges on the top.

Now it's time to add the stem. To create the stem, I just cut out "stem" shapes freehanded from a piece of folded brown fabric.

I stitched the edges together on the sewing machine and turned it right side out. You may need to use something to help push the corners out. I carefully used my closed scissors. Add a little poly-fil to the inside and fold the bottom edge under.

Fit your stem around the "stump" at the top of your pumpkin and stitch it on with your embroidery floss.
I had a hard time getting a picture of this, sorry it's kind of blurry (another job for my dream camera!!).

Once the stem is completely attached, tie off your floss and then pass through to the bottom one last time. Now you can tie off the floss at the bottom and cut off the excess. You can kind of squish around the filling a bit if it's a little lopsided. Your pumpkin is now finished and super cute!

I only used my sewing machine for the initial straight seam and the stem. The rest is done by hand. If you don't have a sewing machine, I'm sure the entire thing could be done by hand.
Now all that's left to do is decorate with your pumpkins.

Pumpkins in a wire basket.


Pumpkins on a wire cake stand.

Pumpkins in a patch.

These little cuties can grace your home all Fall long.

Happy pumpkin season to you!
Cheers!
Jenn


These are so pretty and really make a lovely fall decoration whether on a table, in a basket or on a cake stand!! Nice job and great choices of fabric!
ReplyDeleteEasy peasy directions for such a cute and clever project! I need to make some of my own. When I can get off the computer and find some time... LOL
ReplyDeleteThanks for sharing. Visiting from Kate's party.
~ Sue
Hi Jenn, great job on the pumpkins and love the fabric you chose! Your tutorial was excellent.
ReplyDeleteHave a wonderful day,
Gail
These are the prettiest fabric pumpkins I've seen this year! I love them!
ReplyDeleteThanks for sharing the steps to making these. Yours are beautiful!!!
ReplyDeleteThese are by far the cutest fabric pumpkins I've seen - love the shape and especially the lines. Thanks for the great tutorial - I tend to get lost with most sewing instructions, and I made it all the way through yours. A+ work!! I'm your newest follower. Come say his when you have a minute! Carrie, carrieandcompany.blogspot.com
ReplyDeleteThese are so fabulous...(as she heads to her fabric bins). Thank-you so much for the detailed tutorial, I can't wait to whip up a bunch of these!
ReplyDeleteThose ARE cute! Don't you just love Martha?
ReplyDeleteJenn, I just saw your post over on Home Savvy. These pumpkins are adorable!! Very cute! I am a newbie to blogging and your newest follower. I hope you will follow back! God bless you!
ReplyDeleteWhat a great tutorial! Thanks for the easy to follow instructions. I shared your project on my Friday Five round-up today: http://welcometoheardmont.com/2011/10/friday-five-fall-style/
ReplyDeleteThanks for the inspiration!
Meredith @ Welcome to Heardmont
You make it look so easy! Thank you for this tutorial and all the wonderful photographs! Your pumpkins look very nice..!
ReplyDeleteJenn those are simply adorable. You did a great job. Thanks for sharing with the newbie party.
ReplyDeleteJust too cute! Love them! I'm gonna have to make a few myself. Thanks for the tutorial!
ReplyDeleteThese are great. I will have to try them myself.
ReplyDeleteYou did an awesome job on these darling pumpkins!!!
ReplyDeleteHi Jen. I am admiring your beautiful pumpkin art. I love to sew as well so appreciate the work that you have put into creating these. Love the fabrics you have chosen...excellent. They look so beautiful displayed in the wrought iron. I am a follower now and have a new blog as well. I invite you to join me. Hugs, Gayle
ReplyDeletehttp://atastefultouch.blogspot.com
The pumpkins are adorable. I love that you did a whole bunch of them so they can cuddle up together and look even more adorable.
ReplyDeleteWonderful fall colors and textures on these handmade goodies! andrea@townandprairie
ReplyDeleteYour pumpkins are adorable, particularly in the wire basket! I just became a follower & part of the newbie linky party at Debbiedoos!
ReplyDeleteBlessings,
Cindy
Those look great! I love pumpkins like that, but I have two left hands. I might have to give it a shot after your great tutorials though. It inspires me to actually try things I don't normally do. Great job! : )..
ReplyDeleteWow-you've really outdone yourself with this one!! These pumpkins are absolutely adorable-thanks for the tutorial! Will definitely be trying these soon-LOVE them!
ReplyDeleteLove these pumpkins! You are so talented. I am just beginning to learn to sew and I think I will try these. Thanks for the tutorial.
ReplyDeleteCindy
Hi, I’m a new Follower of your blog and I just gave you a Versatile Blogger Award over at Craft Wannabe. Please stop by & see who else got the award & maybe become my newest follower. Thanks!
ReplyDeleteThese are absolutely adorable and such a great idea!! I love the fabric you used too. Stopping by from Debbie's.
ReplyDeleteThose are such cute pumpkins because of the great fabrics and colors you chose. Over from Debbiedoos and hope you will join my weekly party on Wednesdays some time.
ReplyDeletevisiting from Debbiedoos- these are ridiculously adorable!! thanks for the tutorial :D
ReplyDeleteI love these. Stopping by from Debbies. I see your a newbie to blogging. Welcome.
ReplyDeleteI love your pumpkins. The fabric choices and colors are perfect. I am a new follower and a new blogger myself.
ReplyDeleteI came here from Debbiedoo's Newbies. These are just wonderful and thank you for the tutorial.
ReplyDeleteI found your blog through Debbiedoo's--These are the cutest little pumpkins and I love the fabric choices:-)
ReplyDeleteJenn, Could I commission the creation of a set of these from you?
ReplyDeleteMy email is thebacksofmyeyelids@gmail.com
Please let me know. They're adorable and I'm not at all creative.